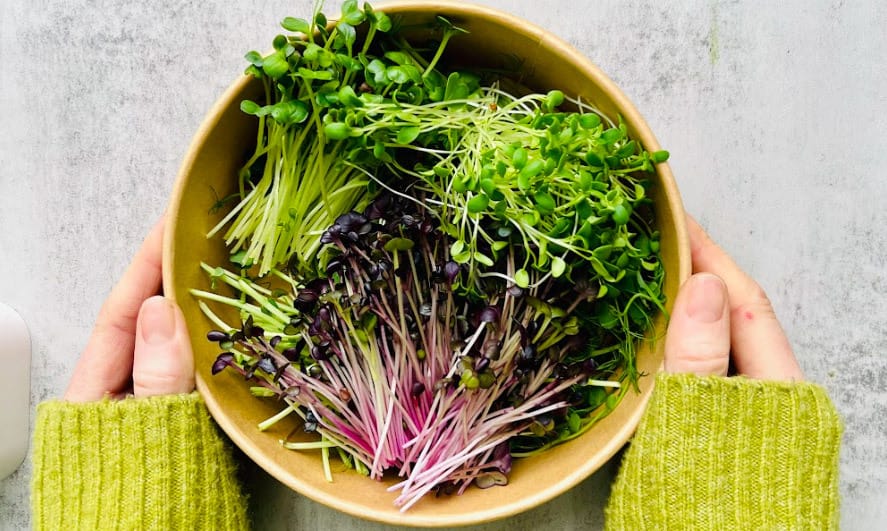
Small, delicious, joyful, and nutritious – these edible wonders can be grown in even the smallest corner of your home
Microgreens have been garnishing the plates of restaurants and cafés for decades now, but an increasing number of us are choosing to grow these little seedlings ourselves, reaping huge mental health and dietary rewards in the process.
As somebody who has overseen a tray or two at home, I can vouch for these benefits. I never tire of seeing their leaves creep over the top of containers, planning out how I’m going to use them in meals (often scattered on salads and eggs, but most recently worked into the most incredible Brazil nut pesto).
What are microgreens?
Unlike most veggies, microgreens aren’t dependent on the seasons, and although they are planted in a similar way to outdoor produce, they are cultivated indoors, and harvested at the ‘cotyledon stage’ when their true leaves come through. Give them space on a shelf or windowsill, water and care for them, and a robust crop of bright, beautiful leaves will appear in as little as seven days. Like joyful little warriors sprouting from the soil, they bring a major dose of happiness and satisfaction to mealtimes. And that’s before we even get to the power they pack nutritionally.
Microgreens are thought to have been instigated by chef Craig Hartman in the early 1990s. His friend, Michael, had launched one of the first hydroponics farms in America, and agreed to grow some ‘baby greens’ for Craig to use in his restaurant. A plethora of neat little greens soon followed in the form of red romaine, tatsoi, oak leaf lettuces, and rocket, providing Craig (and countless other chefs thereafter) a unique and beautiful way to garnish dishes.
These tiny greens are so much more than a way to prettify meals though. Working their magic into everything from soups, salads, and sandwiches to smoothies, omelettes, and buddha bowls, they bring a boost of extra vitamins and minerals to our plates that supersede the nutrients found in their fully grown counterparts. According to an article by Banner Health, a cup of red cabbage microgreens has three times more folate than mature red cabbage. While radish microgreens are higher in Omega 3s and have double the amount of calcium than a radish. However, it’s worth recognising that while their nutrients are more concentrated, we typically eat them in smaller amounts.
Different types of microgreens deliver different nutrients, but in general they are considered to be a great source of vitamins A, E, C, and K, plus minerals calcium, magnesium, iron, selenium, and zinc. They also have fibre and prebiotic properties, making them a win for gut health, too.
Eating living foods
Growing our own food as a form of nourishment can be really empowering, particularly when that food is organic, hugely versatile, and easy to merge into the meals we love.
Most nutritionists would agree that we need ‘live’ foods in our diets to thrive, meaning foods that are consumed fresh, raw, or in a condition as close as possible to their original, living state. This is because they contain vital nutrients like vitamins and enzymes that our bodies need to grow, repair, and thrive. Since microgreens are sown, grown, and harvested from one container with only water and light required to generate growth, they certainly meet the criteria of a live food, providing a good source of nutrients when we need them – even in the darkest depths of winter.
It’s an absolute joy to watch microgreens grow, but the big rewards come at harvest time when you can dive in with your scissors, and cut a portion for an omelette, salad or sandwich, or use the entire crop in a vibrant salad for sharing with friends. The usage moments are creative and plentiful, offering a gateway to a world of new recipes where every meal serves as a definitive act of self-care.

Picking a variety
There are ample varieties of microgreens to choose from, and the best advice is to grow as many as you can (space permitting) to see what flavours and crops you enjoy most. Radish and mustard greens have a clean, crisp, and spicy flavour, sunflower is a little spicy and nutty, while coriander tastes just like, well, coriander! It’s a good idea to start with a simple variety that is hardy and easy to get going, like radish or broccoli. Both are quick to germinate and reach full size, and will bear the brunt of any early mishaps.
On the grow
There are lots of how-to guides online that will help you master microgreens, but the general process is to soak the seeds, soak the growing mat or compost, sprinkle the seeds on top, cover, and place near a window. With daily watering, the seeds should sprout after two to three days, after which the lid comes off and the vibrant leaves will start to appear. When the greens are more than one inch tall, they are most likely ready to harvest.
It sounds pretty easy, right? And it is! Though there are some good tips that can help those early crops come through with gusto:
-
Swot up on seeds. The quality can vary massively, so it’s good to check reviews and order via a reputable company to ensure they’ll thrive nicely. Most seeds can grow on a mat, but some (like sunflowers) require soil for germination.
-
Research varieties. Some species of microgreens are a little more arduous to grow, while others can be more prone to disease. Stick to simple varieties like radish and broccoli, moving further afield as you gain confidence.
-
Find your light. LED light is great for growing greens but natural daylight on a window sill or ledge will do the trick, too.
-
It’s a good idea to keep them somewhere warm. The ideal temperature is between 18–22oC.
-
Glass containers and shallow pots with lids are good options that will happily house microgreens.
-
You might find grow mats that sit inside your vessel a little easier to handle than compost. Hemp, coconut, jute, or natural fibres all work well and are picked up relatively inexpensively online.
-
Regular, light watering is key, with the aim of keeping the microgreens damp but not soaked.
-
Harvest just as the true leaves begin to sprout: around seven to eight days for radish, and 10–12 days for peas, when grown at room temperature.
Photography | Lara Green


Comments